Formulär
Hoppsan! Det verkar som om din annonsblockerare hindrar videon från att spelas upp.
Titta på den på YouTube

Lär dig hur du skapar, delar och samlar in information med hjälp av formulär.
Formulär gör det enkelt att samla in information från andra, även om dessa personer inte ingår i din Notion-arbetsyta eller inte använder Notion alls. Alla medlemmar på alla Notion-abonnemang kan skapa och använda formulär.
Formulär är kopplade till databaser, så varje fråga i ditt formulär är kopplad till en egenskap i din databas. På så sätt finns ditt formulär direkt tillsammans med sina svar, och du kan använda informationen du samlar in på samma sätt som du använder information i alla andra typer av databaser.

Obs: Följande åtgärder är endast möjliga att utföra i Notions skrivbords- och webbappar och kan för närvarande inte utföras på en mobil enhet:
Skapa ett nytt formulär
Anpassa ett formulär
För att skapa ett nytt formulär:
På en sida använder du snedstreckskommandot
/form.Välj
Formuläri menyn som visas.
När du skapar ditt nya formulär skapas automatiskt en Svarande-egenskap för att registrera de svarandes namn. Du kan också tillåta att svarande förblir anonyma i dina inställningar för formulärdelning →.
Obs: För att skapa ett formulär från en befintlig databas måste du ha Full åtkomst till databasen som formuläret är kopplat till.
Om du har en databas som du redan använder för att samla in information från olika personer är det enkelt att lägga till ett formulär i den databasen! För att skapa ett formulär från en befintlig databas:
I en databas väljer du
+bredvid dina befintliga vyer. Beroende på skärmstorlek kan du behöva öppna rullistan bredvid din nuvarande vy och väljaLägg till vy.I menyn som visas väljer du
Formulär.Välj
Skapa {#} frågorför att fortsätta.
Skapa en Skapad av-egenskap i din databas om du vill registrera de svarandes namn. Du kan också tillåta att svarande förblir anonyma i dina inställningar för formulärdelning →.
Obs!
För att redigera ett formulär måste du ha
Kan redigera-åtkomst ellerFull åtkomsttill databasen som formuläret är kopplat till.Villkorsstyrd logik, som gör att du kan anpassa vilka frågor som visas för svarande baserat på deras svar, är endast tillgänglig i Business- och Enterprise-abonnemang.
När du har skapat ett formulär kommer du till formulärbyggaren, som ser ut så här.
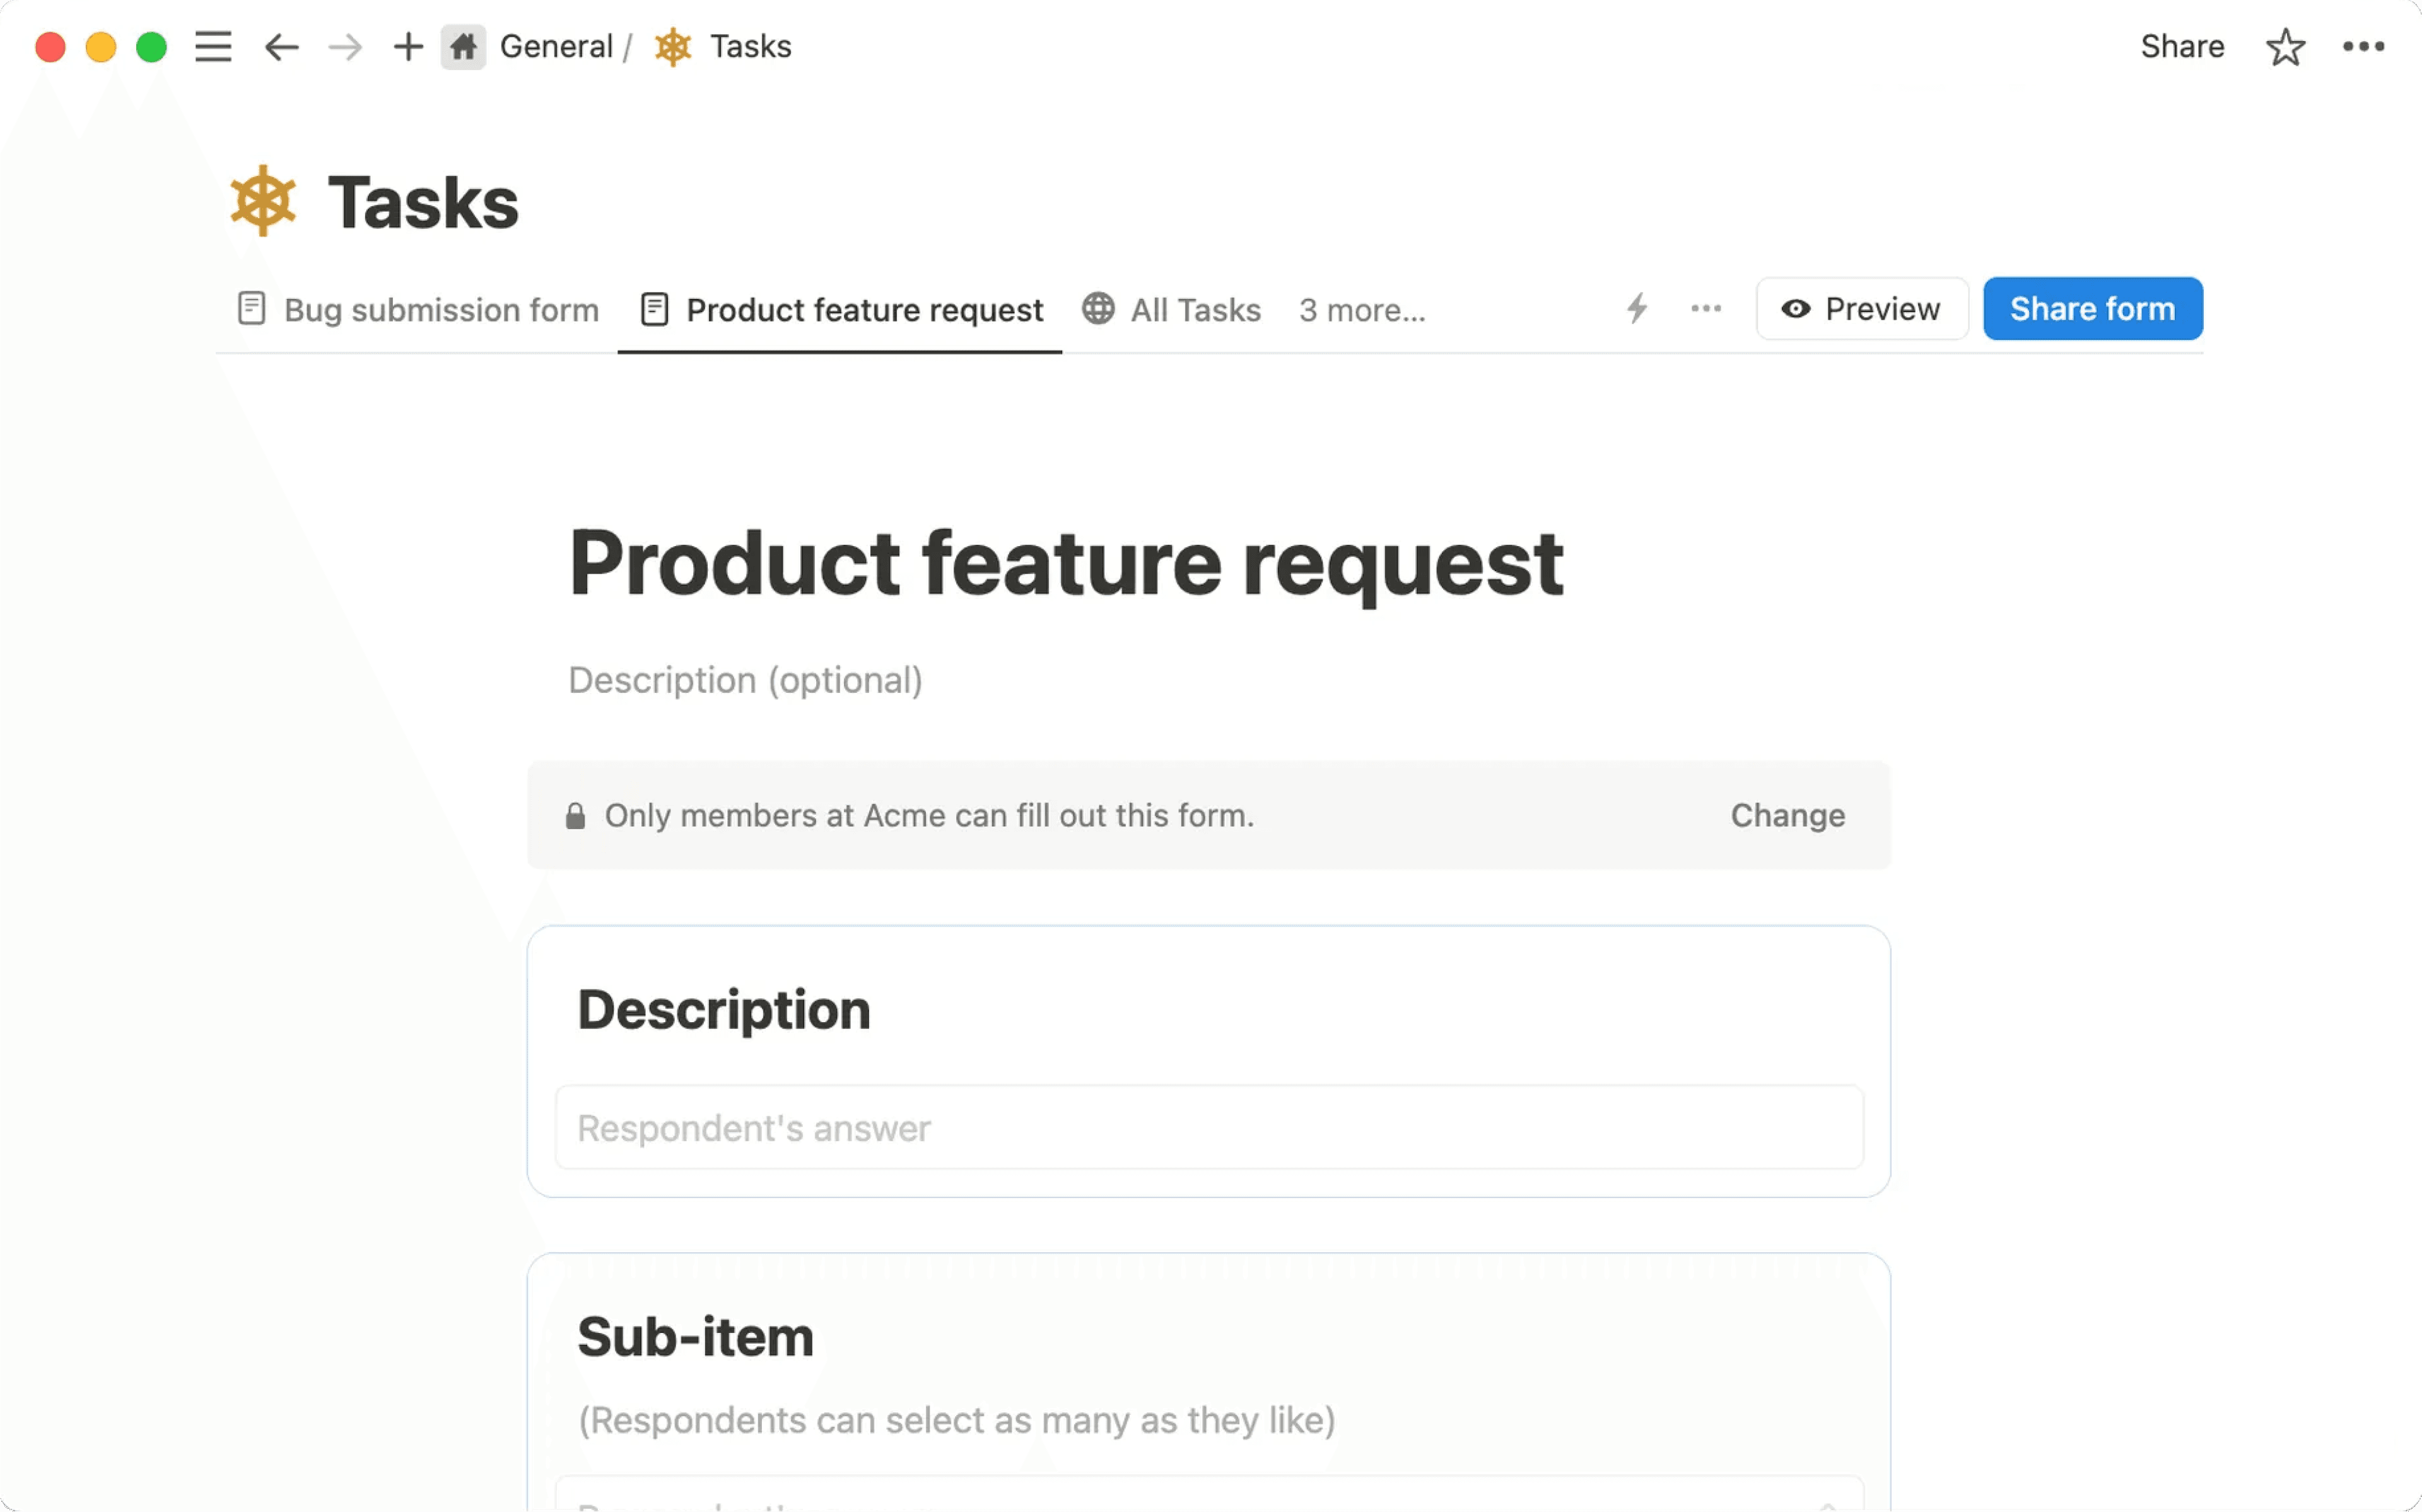
Med formulärbyggaren kan du bestämma hur ditt formulär ska se ut och fungera när du delar det så att andra kan fylla i det. För att konfigurera ditt formulär:
Ge ditt formulär en titel och en valfri beskrivning.
Hovra över formulärets titel för att lägga till en
Formulärikoneller ettFormuläromslag.Klicka i frågorna i ditt formulär för att redigera dem. Som standard synkroniseras alla ändringar du gör i formuläret med namnen på dina egenskaper i databasen. Om du till exempel skapar en ny fråga som frågar ”Vilken tid föredrar du?”, skapas en ny egenskap med samma namn i din databas. Om du ändrar en formulärfråga från ”Favoritfärg” till ”Vilken är din favoritfärg?”, kommer din egenskap ”Favoritfärg” att döpas om till ”Vilken är din favoritfärg?”.
För att lägga till fler frågor i ditt formulär, välj
+under den sista frågan.Hovra över varje fråga i din databas och välj
•••. Härifrån kan du:Gör frågan
Obligatorisk. Det innebär att svarande måste besvara frågan för att kunna skicka in formuläret.Lägg till en
Beskrivningtill din fråga så att folk bättre kan förstå vad du frågar om.Visa alternativ somen listvy eller en rullgardinsmeny om din fråga är en flervalsfråga.Tillåt ett
Långt svarför frågor med textegenskaper.Ändra
Frågetyp, vilket motsvarar egenskapstypen. Detta kan till exempel vara enFlervalsfrågaeller egenskap om du vill ställa en ja- eller nej-fråga. Det kan vara enDatumfrågaeller egenskap om du vill fråga om någons tillgänglighet eller födelsedag.För frågor som är kopplade till egenskaper för flerval, relation och personer kan du ange ett maximalt antal val per svar.
Slå av
Synkronisera med egenskapsnamnom du vill att dina formulärfrågor ska se annorlunda ut än egenskapsnamnen i din databas. Du kanske till exempel vill fråga ”Vilken är din favoritfärg?” i ditt formulär, men vill att svaren ska samlas in i en egenskap med ett enklare namn, som ”Favoritfärg”.Lägg till villkorsstyrd logikom din fråga är flervalsfråga och du har ett Business- eller Enterprise-abonnemang. Om användaren till exempel väljer alternativ A kan du styra dem till en specifik uppföljningsfråga.Kopiera frågaellerRadera fråga.
Välj
Formulärinställningarhögst upp i formulärbyggaren →Skicka-skärm. Härifrån kan du justera inlämningsupplevelsen för de svarande, såsom skicka-knappensFärgochText, samtBekräftelserubrikochBekräftelsetext. Du kan även välja att få en kopia av varje inlämning via e-post.När du är klar med att ställa in ditt formulär, välj
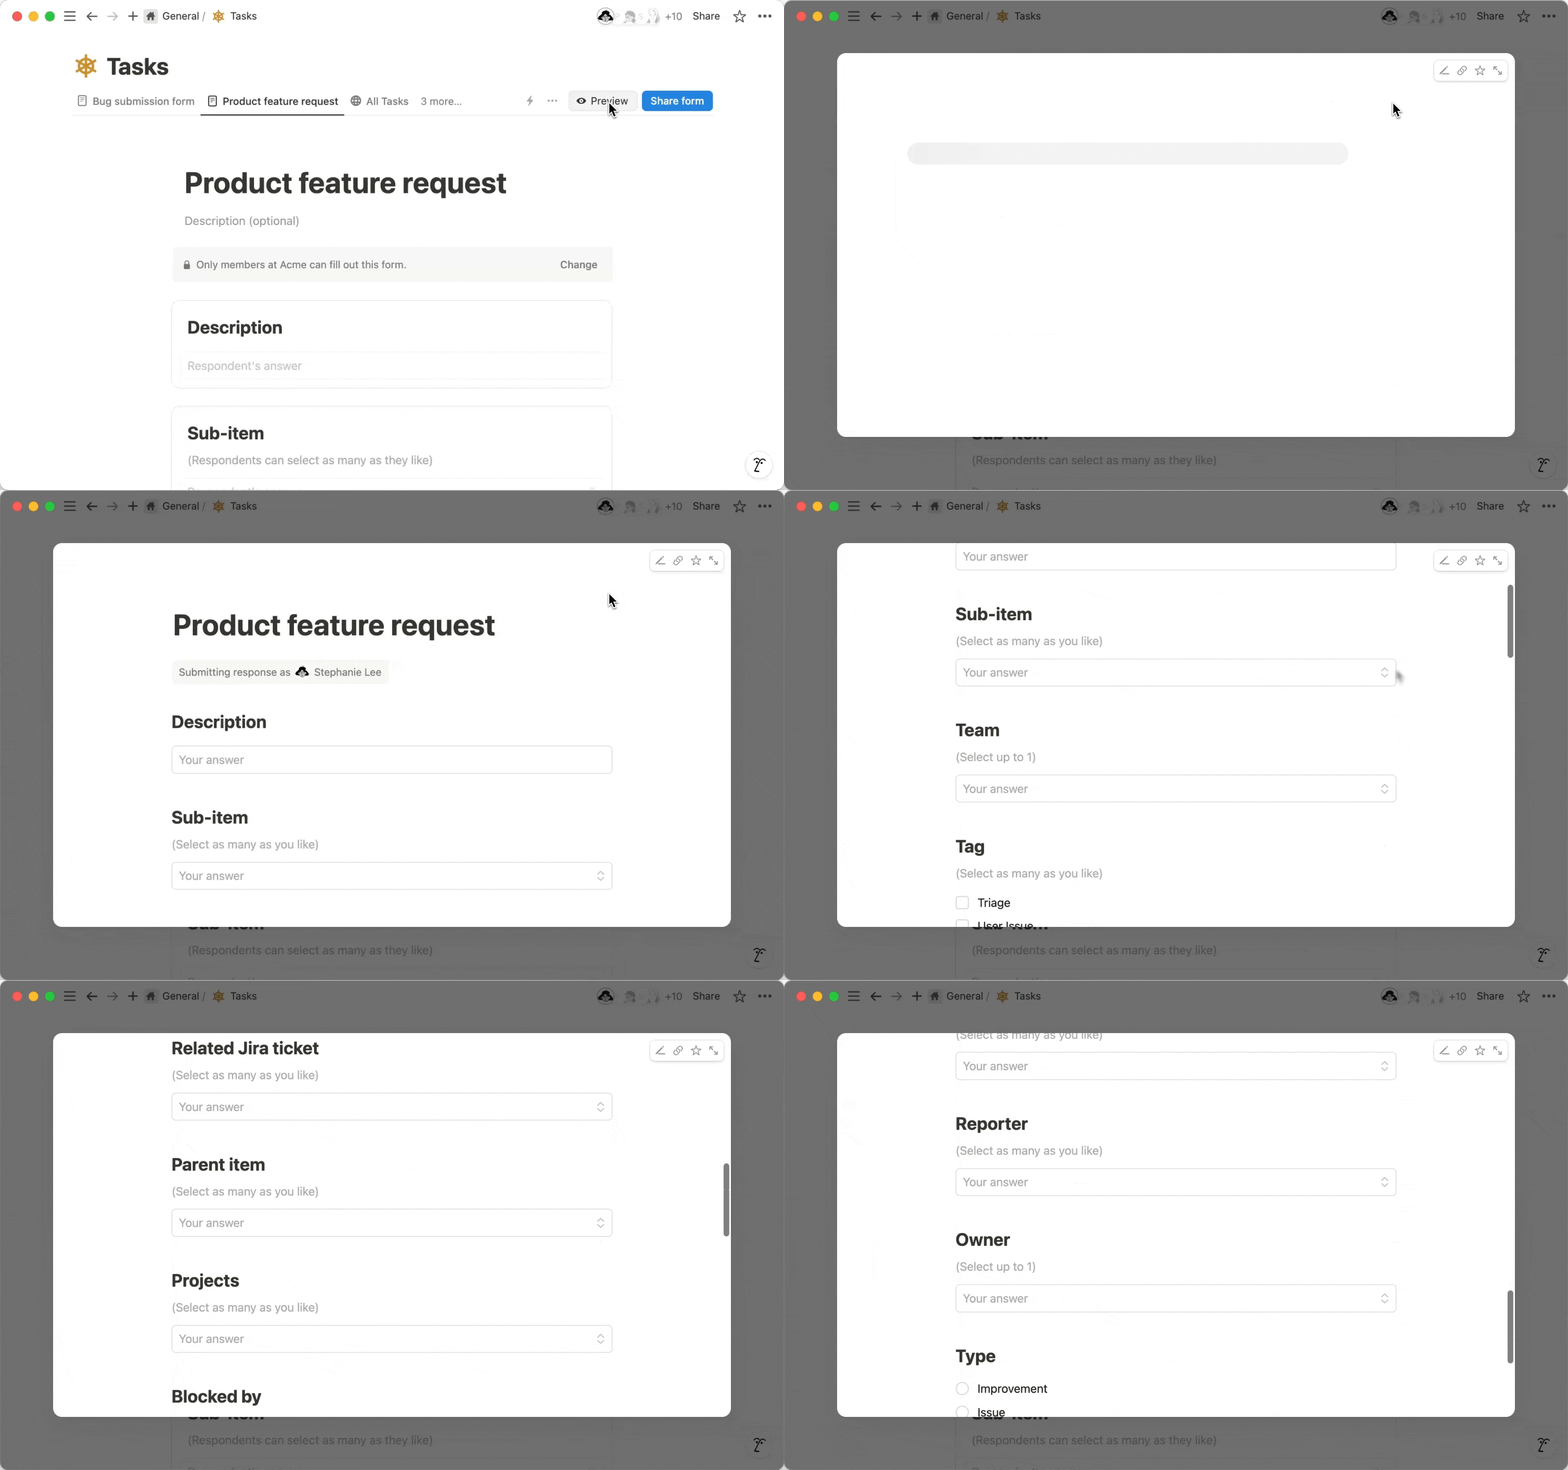
Förhandsgranskahögst upp för att se hur ditt formulär kommer att se ut när du delar det med andra.
Obs!
För att ändra delningsinställningar för ett formulär måste du ha
Full åtkomsttill databasen som formuläret är anslutet till.För att kopiera och dela ett formulärs webbadress måste du ha minst
Kan visaåtkomst till databasen som formuläret är anslutet till.Arbetsyteägare med Enterprise-abonnemang kan välja att förhindra att formulär delas till webben. Läs hur här →
För att dela ditt formulär:
Välj
Dela formulärhögst upp i formulärbyggaren.Välj
Vem kan fylla ioch välj ett av följande alternativ:Alla på {your workspace} med länk, vilket innebär att alla medlemmar i din arbetsyta kan fylla i formuläret om de har länken. Gäster kan bara fylla i formuläret om de har fått åtkomst till databasen som formuläret är kopplat till.Alla på webben med länk, vilket innebär att personer som inte är en del av din Notion-arbetsyta och personer som inte använder Notion kan fylla i formuläret om de har länken.Ingen åtkomst, vilket du kan välja om du vill stänga ditt formulär och sluta ta emot nya svar.
Om ditt formulär endast är tillgängligt för personer i din arbetsyta och anonyma svar är avstängda, kan du välja
Åtkomst till inskickat svaroch bestämma hur de svarande kan interagera med sina svar efter att de har skickats in:Ingen åtkomstinnebär att den svarande inte kommer att kunna se sina formulärsvar efter inskickning.Kan visainnebär att den svarande kommer att kunna se sina formulärsvar efter inskickning.Kan kommenterainnebär att den svarande kommer att kunna kommentera sina formulärsvar efter inskickning.Kan redigerainnebär att den svarande kommer att kunna redigera sina formulärsvar efter inskickning.Full åtkomstinnebär att den svarande kommer att kunna redigera sina formulärsvar efter inskickning, samt uppdatera behörigheterna för sidan som innehåller formulärsvaren.
Om du har valt att dela ditt formulär med vem som helst på webben som har länken och du är på ett betalt Notion-abonnemang, kan du slå på eller av
Notion-varumärkeberoende på om du vill att Notion-logotypen ska visas i ditt formulär.Slå på eller av
Anonyma svarberoende på om du vill att svarandens namn ska registreras när ditt formulär fylls i. Svarande för formulär som är tillgängliga förVem som helst på webben med länkblir automatiskt anonyma.I formulär som skapats från grunden kommer denna information att samlas in i egenskapen
Svarande, som skapas automatiskt i din databas.I formulär som skapats från en befintlig databas kan du skapa en
Skapad av-egenskap i databasen för att samla in denna information.
Kopiera länken till formuläret högst upp i menyn så är du redo att dela.
Obs: Om du delar ett formulär som är en del av en mall som du har kopierat till din Notion-arbetsyta, se till att du skapar en separat version av formuläret från grunden så att alla dina formulärsvar går till dig och inte till den ursprungliga skaparen av formuläret.
Du kan fylla i ett formulär med din dator eller mobila enhet så länge du har formulärlänken och de behörigheter som krävs för att göra det. Tänk på att vissa formulär endast kan fyllas i när du är inloggad i den Notion-arbetsyta där formuläret har skapats.
För att få en kopia av dina formulärsvar måste du logga in på ditt Notion-konto eller skapa ett nytt. Du kan endast redigera dina formulärsvar om du har Kan redigera innehåll-åtkomst till databasen, eller Kan redigera-åtkomst till databassida där dina svar lagras.
Obs!
För att se formulärsvar måste du ha minst
Kan visaåtkomst till databasen som formuläret är anslutet till.För att redigera formulärsvar måste du ha minst
Kan redigera innehållåtkomst till databasen som formuläret är anslutet till.Om ditt formulär har en mycket hög volym av svar kan det ta längre tid att läsa in. Du kanske vill skapa en andra version av ditt formulär eller radera äldre svar som du inte längre behöver.
För närvarande kan du inte exportera en formulärvy av en databas. Prova att exportera dina frågor och svar från Tabellvy istället.
Som standard lagras formulärsvar i en Tabellvy av din databas med namnet Svar. Du ser dina formulärfrågor som databassegenskaper.

Du kan analysera dina formulärsvar genom att filtrera och sortera dem. Du kan också lägga till en diagramvy i din databas och anpassa den för att visualisera dina svar. Läs mer om hur du analyserar dina formulärsvar här →
Du kan bygga in automatiseringar i ditt formulär så att specifika åtgärder kan vidtas när du får ett nytt svar eller när en fråga besvaras på ett visst sätt. Du kan skicka statusuppdateringar till svarande, skicka meddelanden till dem i Slack med mera.
Så här gör du:
Öppna din formulärskapare.
Välj
•••högst upp →Automatiseringar.Lägg till en eller flera utlösare för automatiseringen.
Lägg till en eller flera åtgärder för automatiseringen.
Läs mer om automatiseringar här →
Om du är arbetsyteägare med ett Enterprise-abonnemang kan du förhindra att medlemmar i arbetsytan gör formulär tillgängliga för alla på webben som har länken. För att göra detta kan arbetsyteägare:
Gå till
Inställningar→Säkerhet.På fliken
Säkerhet, växla påInaktivera publicering av webbplatser, formulär och offentliga länkar.
Alla formulär som redan är live på webben kommer att tas ner när du aktiverar den här inställningen. Observera att aktivering av den här inställningen även förhindrar medlemmar i din arbetsyta från att publicera Notion-webbplatser.